Core concepts
Building Your First Bricks Project
This guide provides a step-by-step approach to creating your first Bricks using GPTBricks. Here, you'll learn how to set up a new Bricks project, configure its base settings, and finally test and deploy it.
Creating Your First Bricks
In this section, we will guide you through the process of creating your first Bricks using GPTBricks.
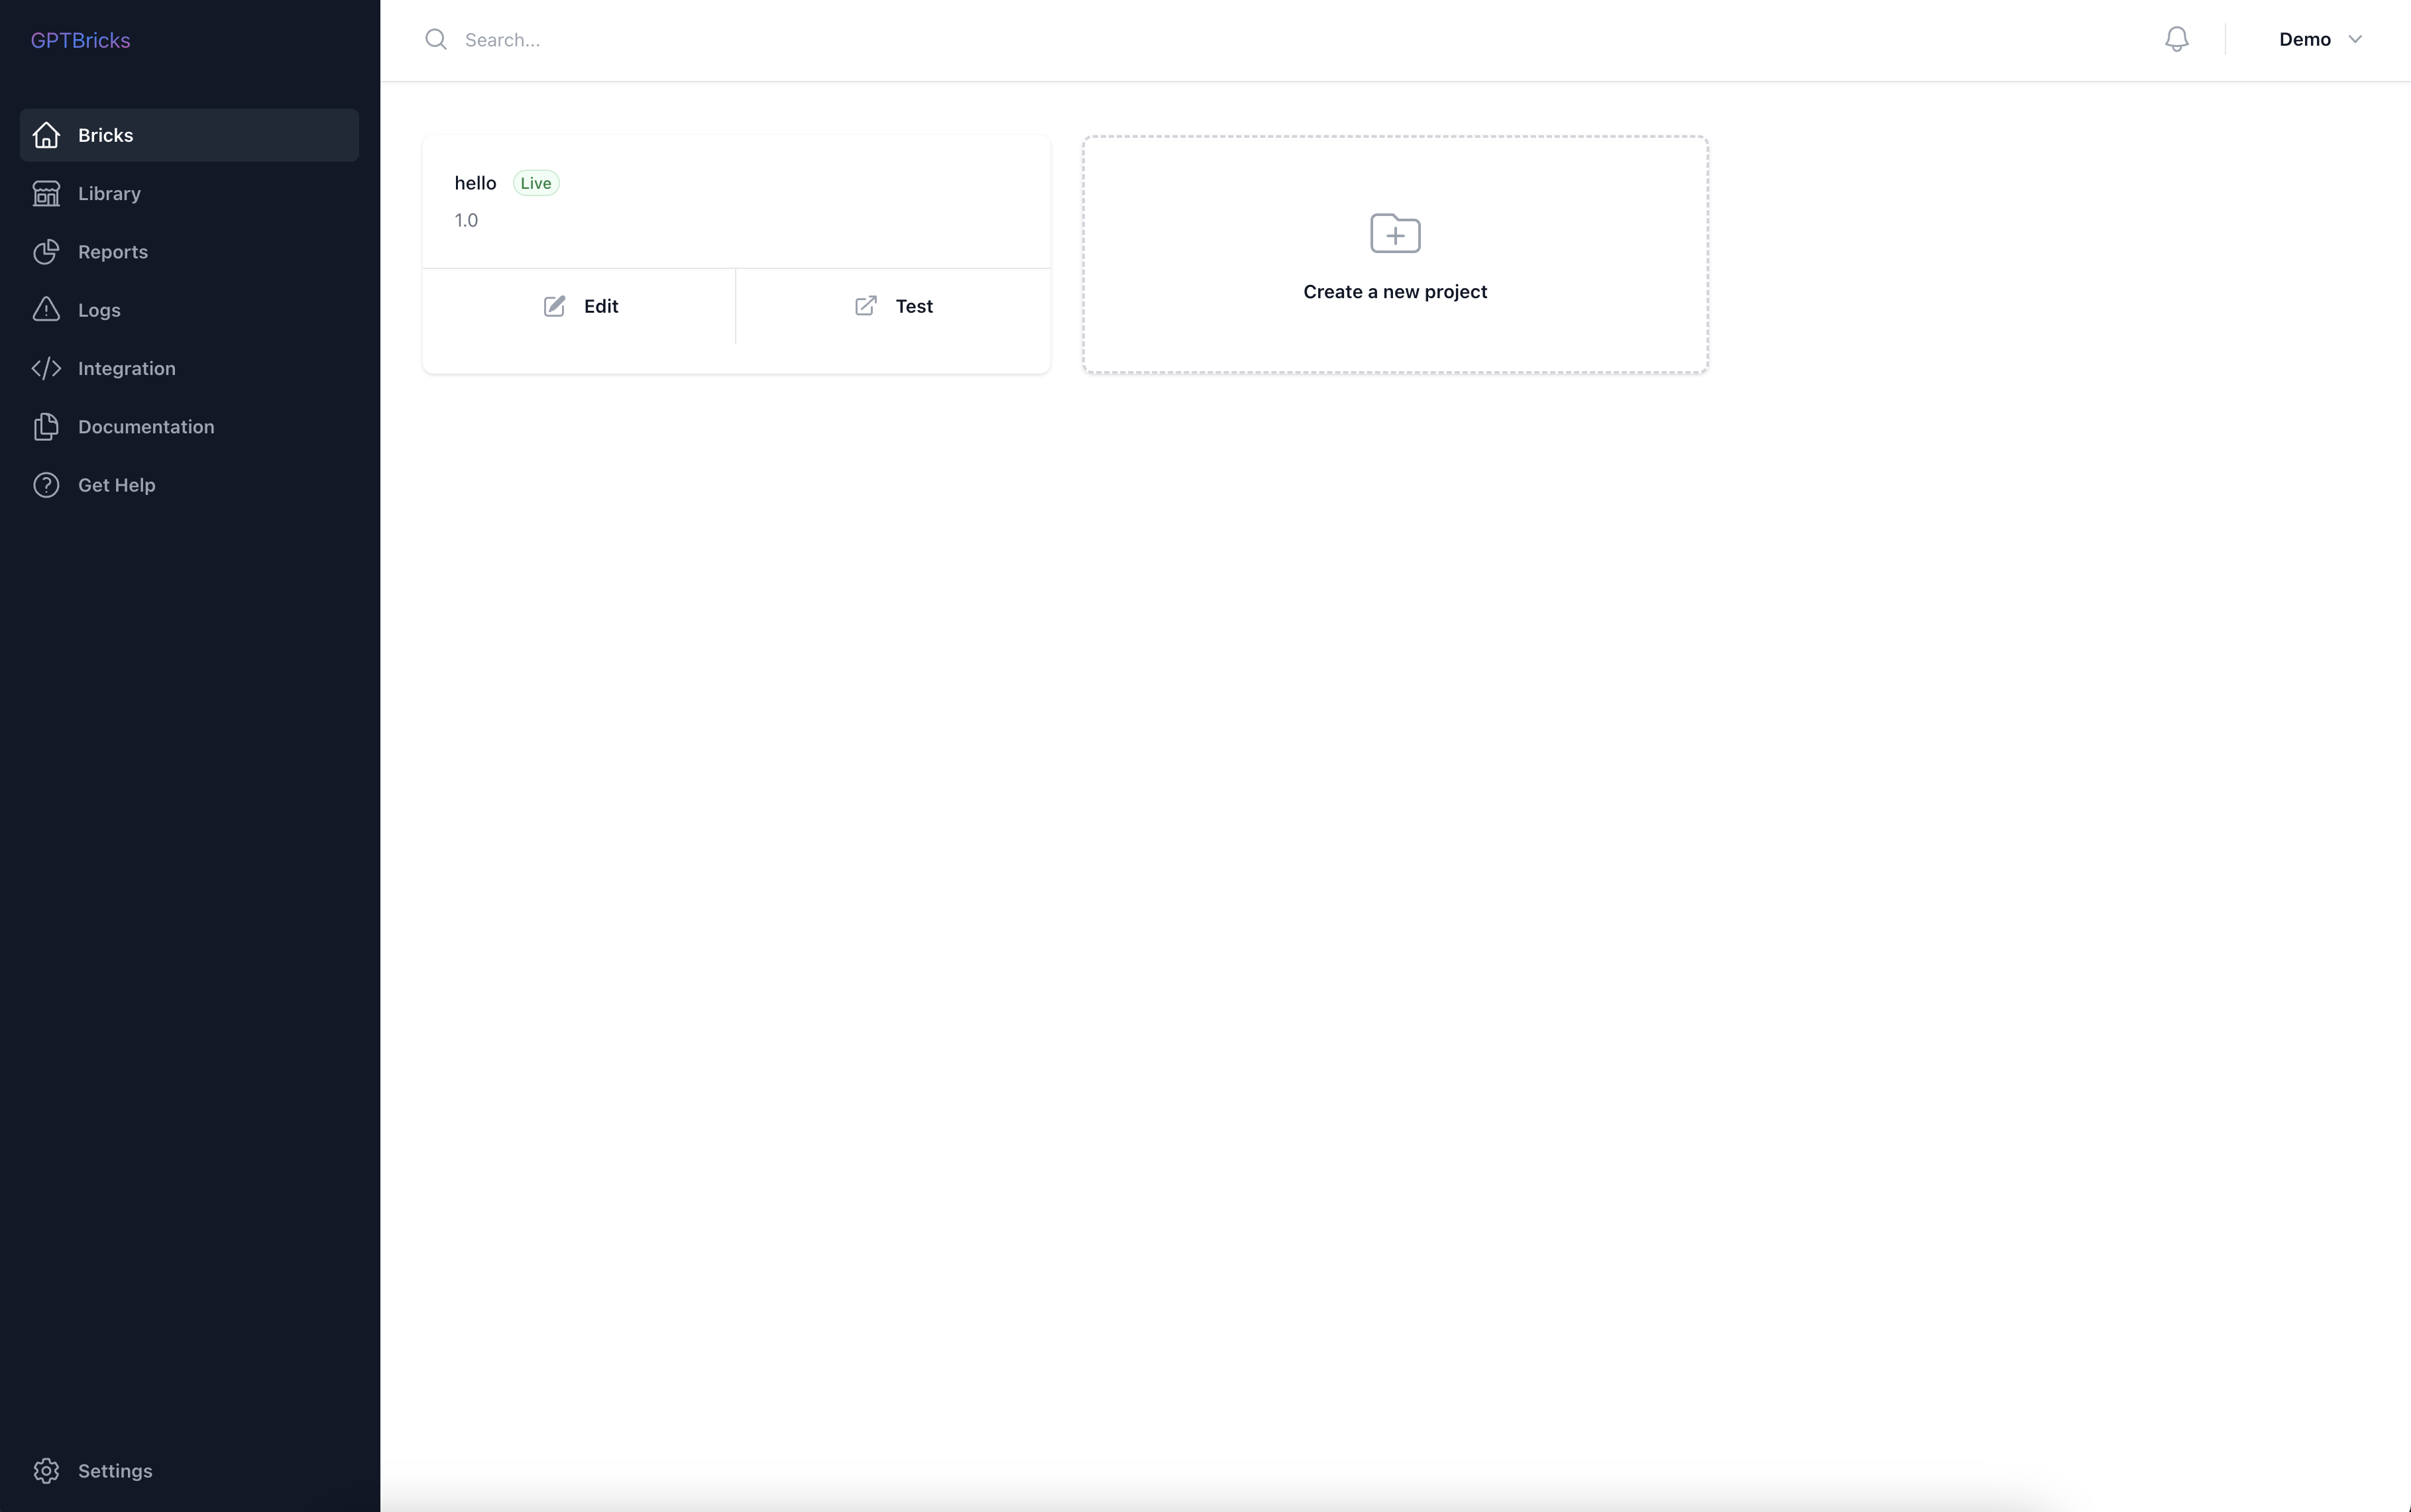
Step 1: Accessing the Bricks Creation Interface
To create a new Bricks, follow these steps:
- Log in to your GPTBricks account.
- Navigate to the "Bricks" section in the dashboard.
- Click on the "Create New Project" button.
- Give a name to your new Bricks.
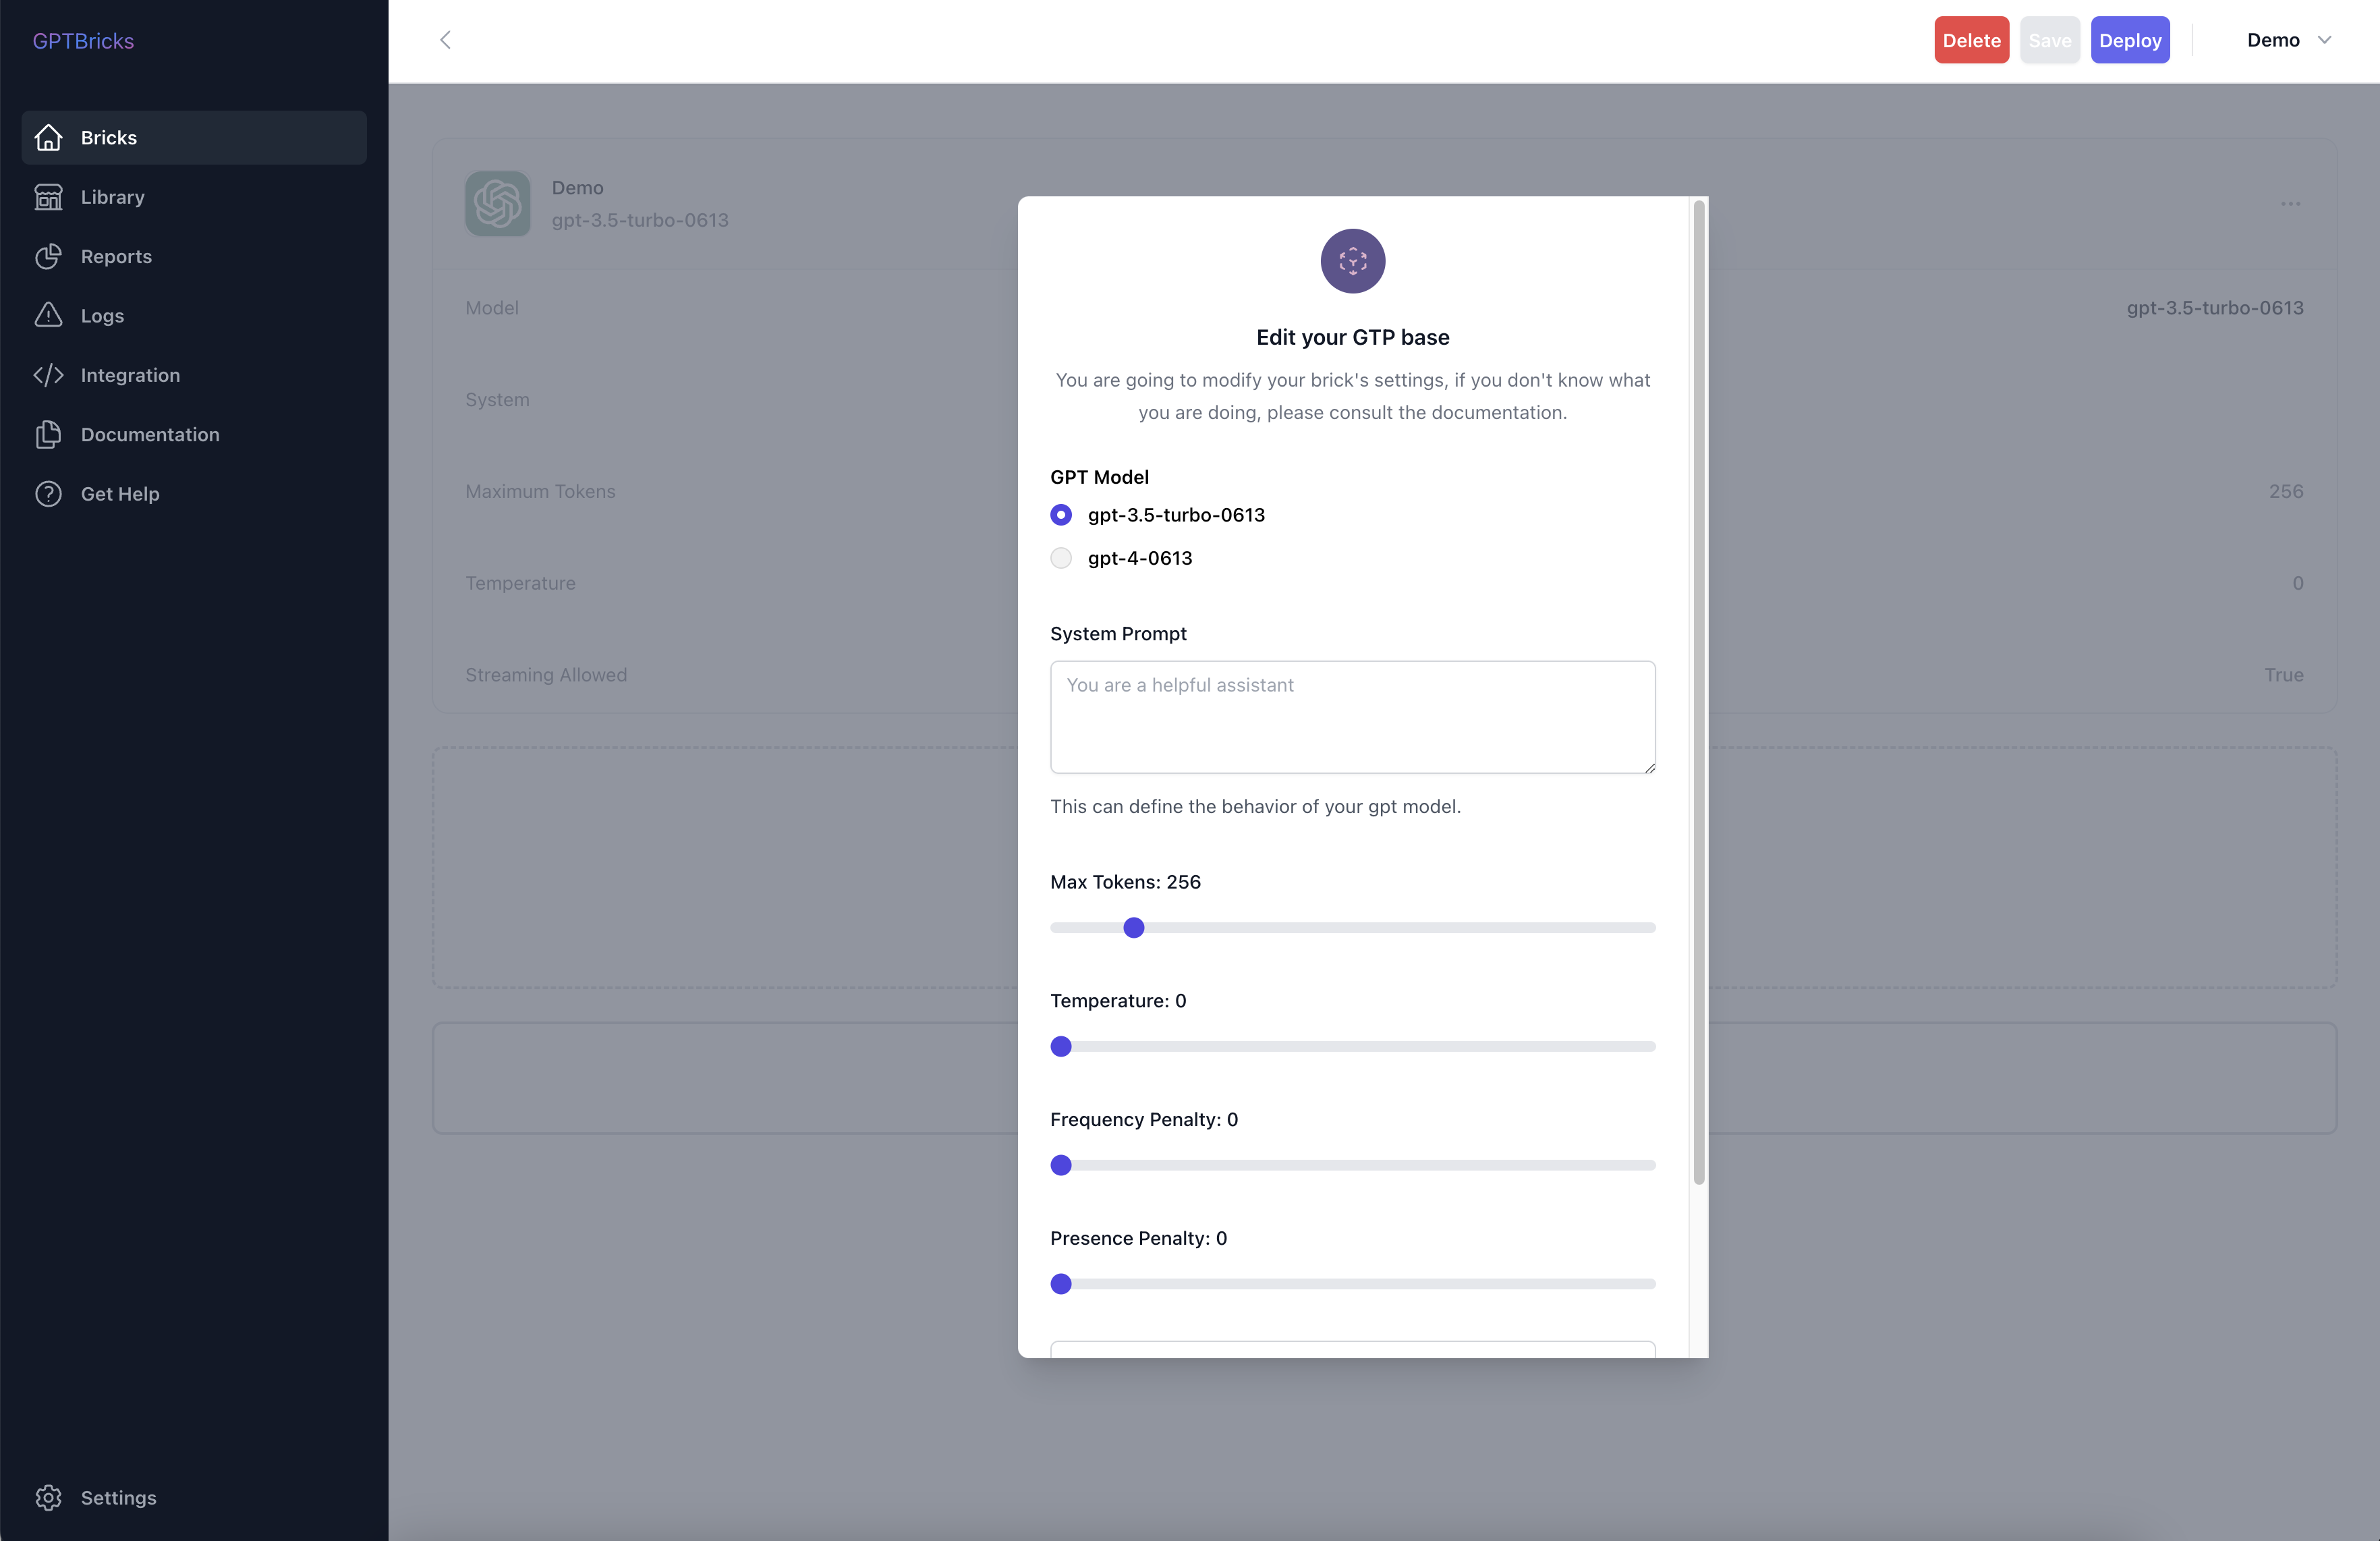
Step 2: Configuring the Bricks Base Settings
Once you access the Bricks creation interface, you will be able to configure various settings for your base model, such as:
- GPT Model: Select the desired GPT model for your Bricks.
- System Prompt: A prompt or initial instruction given to the model to guide its response generation. It helps to set the context or provide specific instructions for the desired output.
- Max Tokens: Specifies the maximum number of tokens allowed in the generated response. Tokens can be thought of as individual units of text, such as words or characters.
- Temperature: Controls the randomness of the generated output. A higher temperature value (e.g., 0.8) produces more diverse and creative responses, while a lower value (e.g., 0.2) produces more focused and deterministic responses.
- Frequency Penalty: Used to discourage repetitive or redundant phrases in the generated text. A higher penalty value (e.g., 2.0) reduces the likelihood of repetitive content.
- Presence Penalty: Encourages the model to provide more unique and varied responses by penalizing the repetition of similar phrases or ideas. A higher penalty value (e.g., 0.6) discourages the model from repeating information.
- Streaming Allowed: Indicates whether your brick supports streaming output. Streaming allows for interactive conversations with the model by sending output in chunks rather than all at once.
- Add Current Date Learning: Specifies whether to include the current date as part of the model's training data. This can help ensure that the generated responses are up-to-date and contextually relevant.
Step 3: Testing and Deploying Your Brick
Once you have configured the settings, you can save and test your Brick. Use the built-in testing functionality to verify the behavior of the Brick and make any necessary adjustments. Once you are satisfied, deploy the Brick to make it available for use within your applications.
That's it! You have now successfully created your first Brick using GPTBricks. Feel free to explore additional features and functionalities to enhance your application-building experience.